resource
Personalize Your Budget with Custom Categories
Every spending journey is unique — your budget should be too. That’s why Custom Categories are such a powerful feature. Whether you're managing student loans, keeping up with pet expenses, or monitoring your grocery costs, Custom Categories let you tailor your budget to match your everyday spending habits.
How to Create a Custom Category
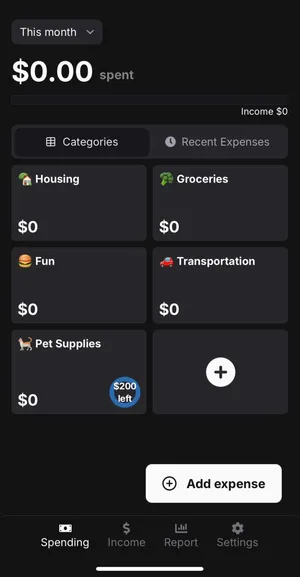
When you first set up your budget, you'll see four pre-made categories to help you get started. These can be customized to suit your needs, or you can create entirely new ones that reflect your unique spending habits.
Creating a new category takes just a few seconds — here’s how to do it:
Step 1: Go to the Main Page
Tap the Plus (+) sign block at the end of your category list. 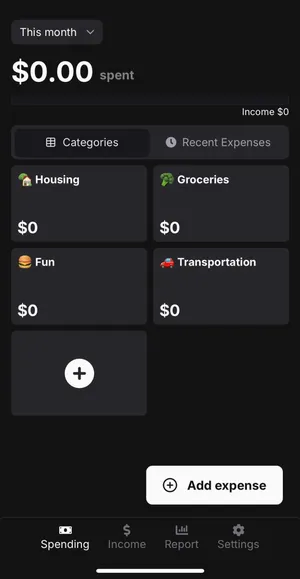
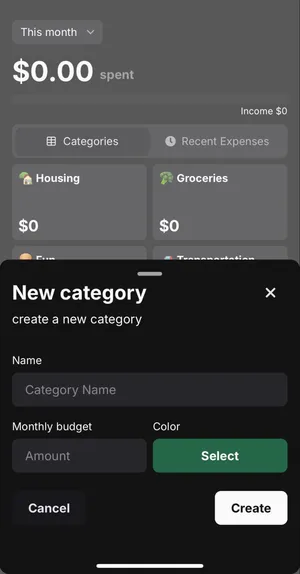
Step 2: Fill Out the Details
A modal will appear with inputs for:
-
Category Name – Name it whatever makes the most sense for your lifestyle (e.g., “Dog Supplies” or “Grocery”. You can even add emojis to the category name!)
-
Monthly Budget – Set a limit that helps you stay on track.
-
Color Picker – Choose a color to keep things visually organized.
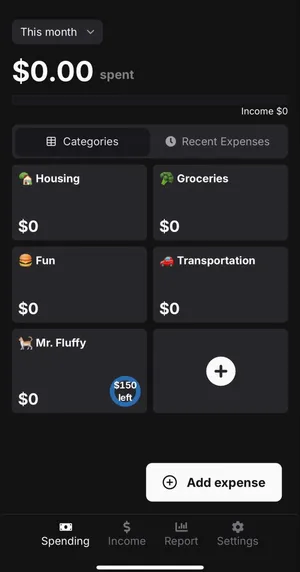
Step 3: Create Your Category
Hit the “Create” and you’re done! Your new category will now appear on your main page.
Editing a Category
Need to make changes to an existing category? Whether you're adjusting your monthly budget or simply updating the name or color, it’s easy to do.
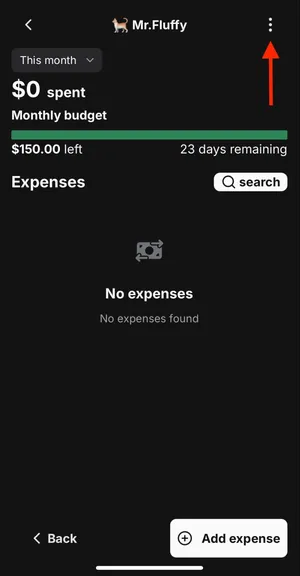
How to Edit a Category:
Step 1: Select the category you'd like to update
Tap the three vertical dots (⋮) next to the category name at the top of the page.
Step 2: Enter New Inputs
A modal will appear with input fields to edit the name, monthly budget, or color. Make your changes and hit “Update”.
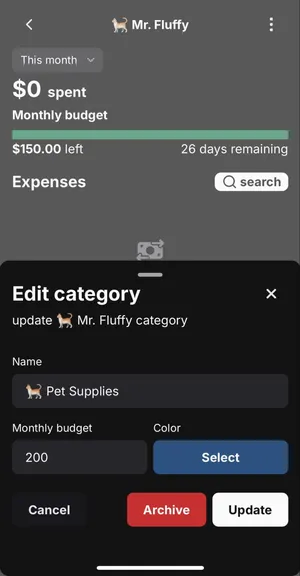
Category has been updated!
Archiving a Category
If you no longer need the category but want to keep its history, you’ll also find an Archive button in the same modal. Archiving removes the category from your main view without deleting your past data. You can bring back archived categories anytime from the Settings > Archives.
In Summary
Custom Categories put you in charge of your budget, offering the clarity and flexibility to organize your money around your actual lifestyle. Whether your spending shifts with the seasons or your priorities evolve, these categories adapt with you—helping your budget stay relevant, personal, and easy to manage.