resource
Getting the Most Out of Custom Tags
Looking for a flexible way to organize your spendings without creating new categories? Custom Tags are your new best friend. They offer cross-category tracking, making it easy to group related spendings that span across different budget areas. Additionally, they add a second layer of organization for things that don’t fit your usual monthly habits.
Whether you're planning a trip, managing seasonal spending, or tracking a project, tags help you group spendings without cluttering your main homepage.
What Are Custom Tags?
Custom Tags are labels that you can attach to an spending on the Optional section (when entering a new spending). They’re designed for flexible use — whether you need short-term tracking for a special event or long-term organization for an ongoing project.
One of the biggest advantages of tags is their ability to group related spendings across different categories. For example, if you're on a trip, you might log spendings under “Food,” “Transportation,” and “Entertainment.” These are all separate categories, but they’re related to the same trip — and that’s where tags shine. A tag like “Beach Trip” brings those spendings together, giving you one clear view of everything tied to that experience.
To make it even better, you create and name your tags yourself, edit them anytime, and customize them as specifically as you need — total flexibility in your hands.
When you’re done using a tag and no longer need it, feel free to archive it — no worries about losing any data.
What Are Custom Tags Good For?
✈️ Trips
Planning a getaway? Use a tag like “Beach Trip” to track travel costs, reservations, and any spending during the trip — no need to create a permanent category just to see what the trip really cost you.
🎁 Holiday Gifts
Track gift purchases with tags like “Christmas”. You’ll keep things organized and give you clear visibility into what you’ve spent at a glance when combining it with Total Sum feature.
🗂️ Special Events or Projects
Hosting a birthday party, planning a wedding, or renovating a room? Use a custom tag like “Birthday Bash” or “Bedroom Reno” to keep track of related spendings in one tag. It’s perfect for anything temporary that’s worth keeping an eye on.
And countless other ways to put them to work!
How to Add and Use Custom Tags
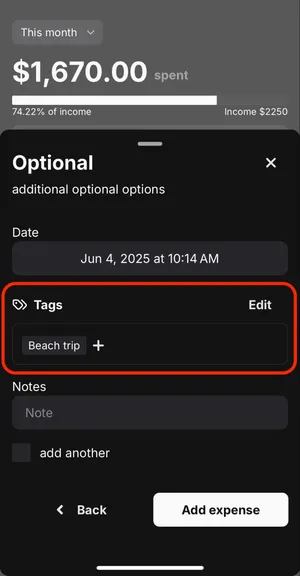
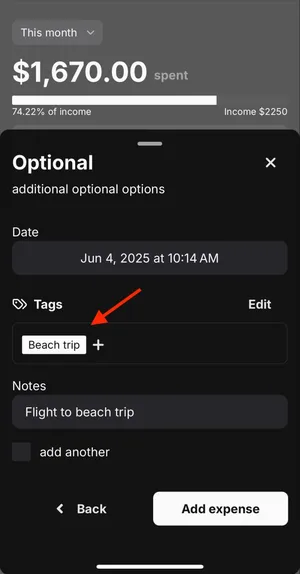
Step 1: Open Optional page
To add a tag, start by adding a new spending and selecting a category. You’ll then land on the Optional page, where you can find the “Tags” section.
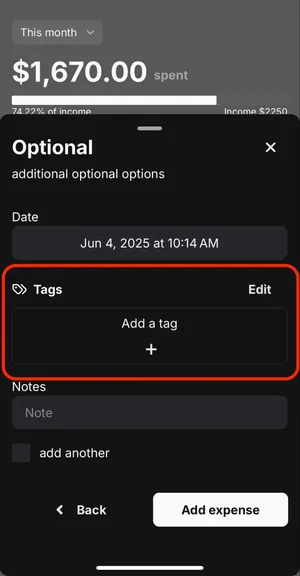
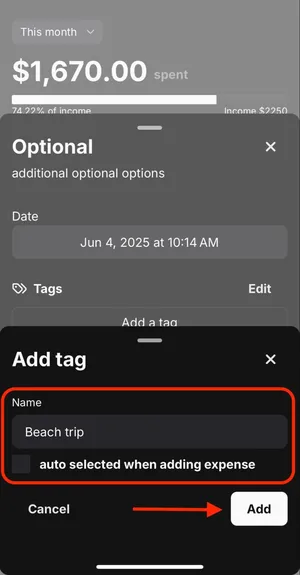
Step 2: Tap the Plus (+) Icon
A modal will appear with input for the tag name. Enter the new tag name and press “Add”. Enabling “auto selected when adding spending” will automatically apply this tag to every new spending added.
Step 3: Great! You have a new tag!
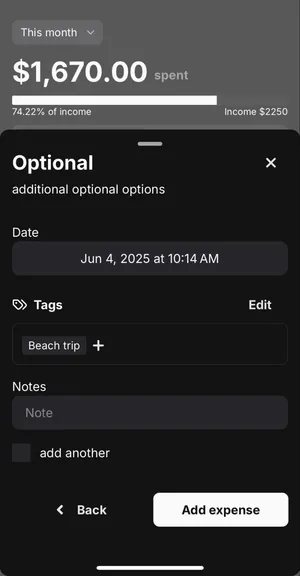
Note: Remember to select the tag, then press the “Add spending” on the bottom right corner.
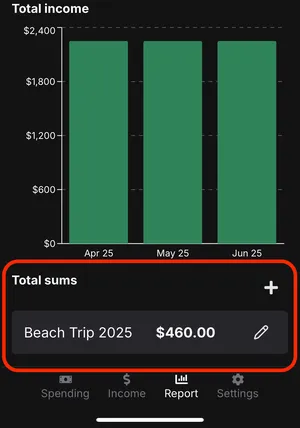
Total Sums & Easy Filtering
Custom Tags make it easy to see total spending grouped under any specific tag. On the Reports page, you can set up a Total Sums on a specific tag simply by selecting the tags you want to sum. Plus, you can filter your spendings to display only items with a particular tag attached.
📖 Want to see how to set up a Total Sums? Check out our “Tracking Big Picture Spending with Total Sums” article.
Archive Tags
When you no longer need a tag, you can archive it while still preserving all the associated data. Archived tags can be easily restored anytime from the Settings page under “Archives”, if you need them again.
The Bottom Line
Whether you're prepping for the holidays, tracking a special event, or managing a project’s cost, Custom Tags offer flexible, cross-category tracking without the commitment of a full category. They’re the perfect tool for grouping related spendings that span across different parts of your budget — making it easier than ever to stay organized.
Start tagging, stay organized, and make your system work for you.
📖 Want to see an example in use? Check out how we used Custom Tags in our “The Ultimate Travel Companion: Budgeting Our Asia Trip with Macdeso” article.